Rocket Mass Heater for my home

Rocket Mass Heaters, Rocket Ovens, Cold boxes, Solar collectors, etc..
Talk about your projects

Moderator: matt walker

Re: Rocket Mass Heater for my home

Postby matt walker » Wed Feb 08, 2012 3:04 am

Sunday, I was beat, and mostly rested and worked on drying the stove by burning, and planning the next step. A friend came over and we played with burning it different ways. Tall feed tube, short feed tube, covers, no covers, choked air, etc. It was fun, and without the mass the barrel alone had the house as warm as the box stove could ever achieve, and with a lot less fuel, for sure. I was pleased.

Image

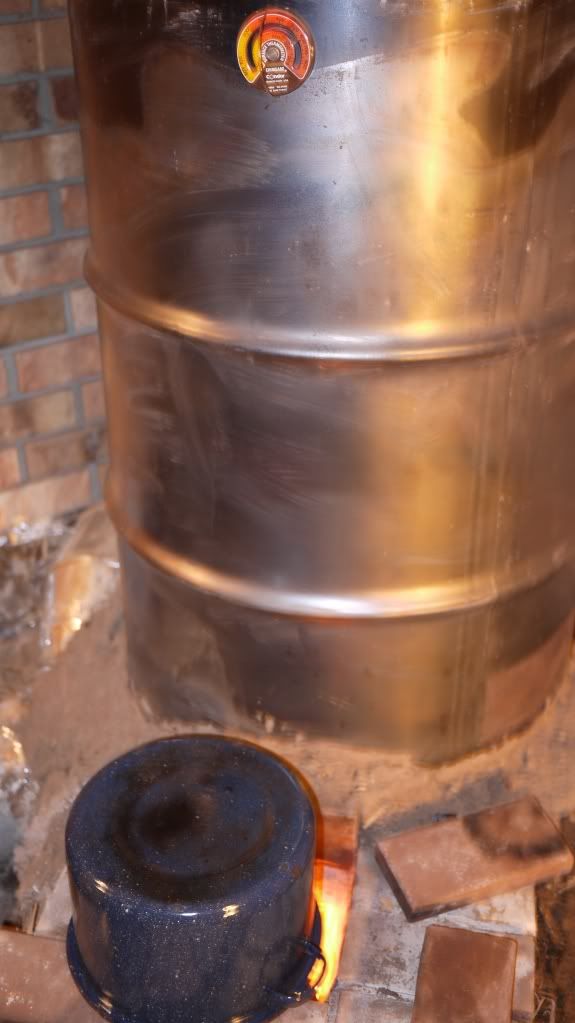
In this shot you can maybe make out the thermometer. 600* there.

Image

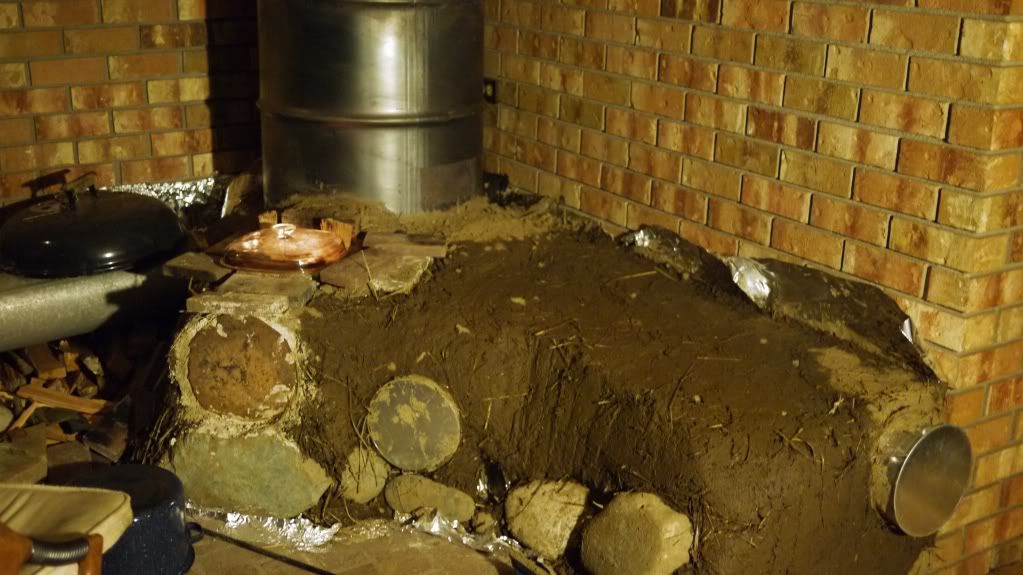
Monday, I was back out in the clay, digging and moving it in buckets. Oh man, it is a lot of work. I can't imagine building a house that way. I made another batch of cob, and last night started hauling it in and forming up the first bench. I got it roughed in, although I'm a few inches shy in all dimensions so I can do a final shape and level and all with some finer screened material. There's a clean out there in front which I will recess a bit when it's finished, and a small air intake port that mates with the original brick wall. The wall has large openings all along the top row, and a few small inlets along the bottom. I plumbed a four inch dryer vent to the wall's intake, and after firing it for a while it will suck a match flame into the intake! I'm thrilled about that.

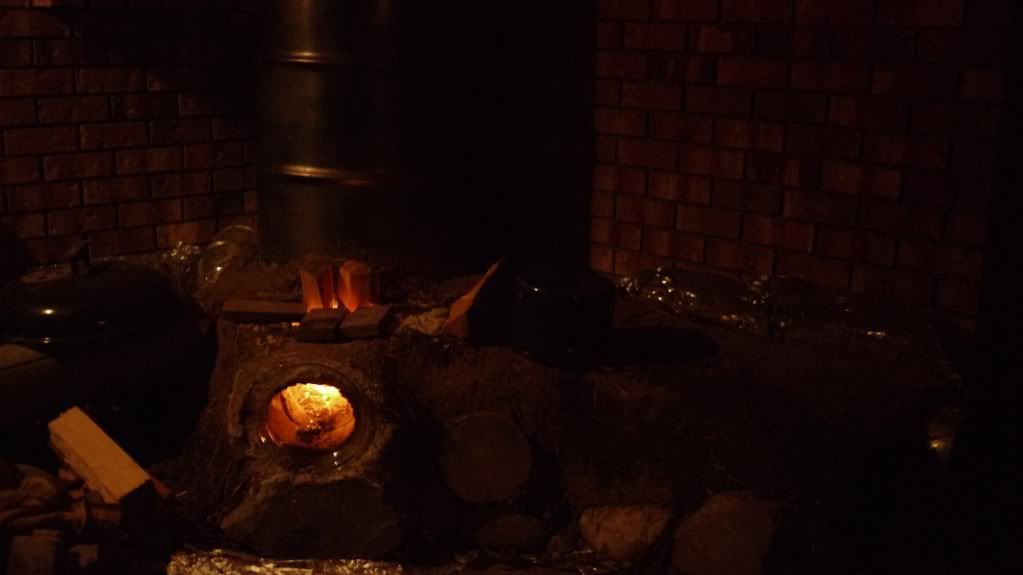
So, here's what I have at this point. The area around the burn tunnel is unfinished, and, well, there's still a lot to be done, but it's coming along.

Image

Image


There's some more pictures here:
http://photobucket.com/Rocket_Mass_Heater
User avatar
matt walker
Site Admin
 
Posts: 1806
Joined: Tue Jan 03, 2012 5:50 pm
Location: North Olympic Peninsula

Re: Rocket Mass Heater for my home

Postby matt walker » Wed Feb 08, 2012 3:16 am

I've learned a couple really interesting things.

I currently have a window in the viewing tunnel, and so far so good. I used the barrel bottom as a cover plate there for most of the last few days. The little metal disc in that location seems like a great thing to me. It was really nice to sit in front of that thing and have it radiating heat down so low. If the window doesn't work out, I'm excited to have the metal radiator. I had planned on plugging the tunnel with cob if the window idea was a failure, but I think even if the window doesn't work having a radiator down low is a big improvement. I put the thermometer on it, and when the feed was covered it would almost hit 400*, but typically was riding at around 200*.

I made an insulating ring for the window molding, thinking that they fail due to thermal shock of cold edges and a hot middle. I molded perlite and fireclay into a trim ring and pressed a pyrex pie plate into it. I then removed the plate and covered the hole with the metal while I fired the stove for a day and dried it. I'm in the first trial right now with the window in, and so far so good. It's only been burning a few hours though, so we'll see.

The biggest thing I learned is what a difference a little insulation or the lack thereof can make. I had put a couple clay paver tiles in the bottom of the feed to protect the clay. The stove was running well, but on the second day I thought I'd try pushing the tile up under the heat riser instead. Whoah. The stove just about took off! I think that putting the red hot tile under the heat riser added some motivation, but the big change came from the feed tube not holding heat at the bottom, heating the sticks and pushing air out of the feed. I think this could be a big improvement over the current fire brick model of rocket stove core. If, instead of an ash pit or a fire brick bottom, a small section of insulation was added right under the fuel feed, I think every stove out there would see a big increase in motivation. This thing literally roars, and moving the heat out from under the burning material made a huge gain in that respect.
User avatar
matt walker
Site Admin
 
Posts: 1806
Joined: Tue Jan 03, 2012 5:50 pm
Location: North Olympic Peninsula

Re: Rocket Mass Heater for my home

Postby Lollykoko » Wed Feb 08, 2012 4:10 am

Great pictures, Matt.

Was the mold still showing damp around the edges when it wasn't heated? How many days/burn hours did you have on the burn tunnel casting before you removed the mold?
User avatar
Lollykoko
 
Posts: 575
Joined: Sun Jan 08, 2012 9:04 pm
Location: Howard and Miami Counties, Indiana

Re: Rocket Mass Heater for my home

Postby matt walker » Wed Feb 08, 2012 4:19 am

It was damp, and when I removed the mold some was still very soft. I estimate I probably burned it for around 30 hours before the mold came off, and then another 12 or so after that. If I did it this way again, I would fill the mold incrementally and let some of the moisture escape each night. I also wouldn't build it as thick. This thing is so insulative it's just unbelievable.

Here's a picture from a few minutes ago.

Image
User avatar
matt walker
Site Admin
 
Posts: 1806
Joined: Tue Jan 03, 2012 5:50 pm
Location: North Olympic Peninsula

Re: Rocket Mass Heater for my home

Postby missusmlaargh » Wed Feb 08, 2012 5:04 am

Awesome man, I am seriously impressed.
User avatar
missusmlaargh
 
Posts: 28
Joined: Mon Jan 09, 2012 7:09 pm

Re: Rocket Mass Heater for my home

Postby Lollykoko » Wed Feb 08, 2012 5:55 am

That viewing window is extremely nice. I hope the layer of insulation you put around it will make it practical.

Since you talked about casting your firebox, I've been considering the possibilities. My "Materials and Processes" class was 30 years ago, but I should be capable of making a negative 2 part mold to "cast" the working parts. Visions of plywood and 2X4's will be dancing in my dreams tonight. :)
User avatar
Lollykoko
 
Posts: 575
Joined: Sun Jan 08, 2012 9:04 pm
Location: Howard and Miami Counties, Indiana

Re: Rocket Mass Heater for my home

Postby eeldip » Wed Feb 08, 2012 6:31 am

600 degrees is all you got? you can't even cook a proper pizza with those chilly temps. WINKY FACE.
eeldip
 
Posts: 42
Joined: Tue Jan 10, 2012 2:45 am

Re: Rocket Mass Heater for my home

Postby pa_friendly_guy » Wed Feb 08, 2012 2:52 pm

The pictures are Great Matt. It really does give us a good idea of what you have done and what you are doing. From the last pic it looks like you have the pyrex plate installed permanantly in the front. It does not apear to be getting dirty from the smoke at all, because the smoke and flames are sucked up into the stove. Your 2 wing design puzzled me at 1st, I was not sure how you would make that work. I see now how the smoke goes. Cleaning that complex system with so many 90's and 180's could be fun, but I understand that because of the clean burn you may not clean the flue for maybe 10 years. You lrft several access point for cleaning so maybe that will not be so bad. I am glad it is burning well for you, and I am very glad to hear that it is putting out the heat that you need. This unit is a Heater after all. How it looks and feels when you sit on it is secondary. How it heats the house is the primary thing to consider. How is it to clean out the ashes? It didn't look like the unit has an ash pit and I wondered how often you needed to clean it. That is one thing I have wondered about RMH is how often do you need to clean out the ashes.
Never doubt that a small group of dedicated people can change the world, indeed it is the only thing that ever has.
User avatar
pa_friendly_guy
 
Posts: 1502
Joined: Sun Jan 08, 2012 9:24 pm
Location: SW Pa They changed me to zone 6a what ever that is. I still figure zone 5

Re: Rocket Mass Heater for my home

Postby matt walker » Wed Feb 08, 2012 7:07 pm

Good questions Guy. I cleaned the burn area today, got about two cups of fine ash, no charred remains or any burnable material, just some powder. I just stuck my hand in there and pulled out the little bit of stuff. I pictured using a shop vac, but you know how they just rearrange the fine stuff all over the house, so I thought better of it. I did pull an inspection cover, the one nearest the barrel, and there was nothing at all in there. I'm hoping that's how it will continue, but I do have a 10 ft hose for a good shop vac, and dust all over not withstanding, it should be easy to snake it around the whole system. Hopefully that will only be necessary for an annual cleaning or so.

The Pyrex isn't going to work, but it's been fun playing with it. That one in the picture held up for about 6 hours of burning or so, but when they go, they have a tendency to explode. I had a grate leaned up against it all night just in case of that event, and I was glad I did. I do think I'm going to get the window to work though. Ceramic wood stove window glass is rated to 1400*, and that spot only just brushed 400* when I had the stove running full tilt. I think I have figured out a mounting system that will work, I hope so. That said, the plate is a nice heat radiator, and just this morning I ran the stove with the top feed covered and the front open, and that was nice as well. I could look in there and see the flames from my seat here, and it burned vigorously with that big feed stuffing air past the fuel. I'm really pleased with the dual wing design, as you put it, Guy. It is teaching me a lot and seems to offer some exciting options for fuel/air/viewing.

If I was okay with spending more cash on this project, I'd for sure buy a little masonry stove door with a window and install it right there. I'm going to keep my eyes open for scrap wood stoves with glass faced doors. That seems like it would be the ideal, having a door/window/vent there.
User avatar
matt walker
Site Admin
 
Posts: 1806
Joined: Tue Jan 03, 2012 5:50 pm
Location: North Olympic Peninsula

Re: Rocket Mass Heater for my home

Postby pa_friendly_guy » Wed Feb 08, 2012 9:42 pm

Re-using an old stove door would be a great idea if you can find one. Maybe a stove dealer might come across one when they are replacing a stove for someone. Buying a new door as a replacement part for an existing stove might also be possible but a bit more pricey. Since the pyrex idea is out the metal plate radiator works well for sure, so you can always just go with what works. Works well and its free sound like a good combo to me. Your project should just get better and better as you add more mass and get it closer to completion.
Never doubt that a small group of dedicated people can change the world, indeed it is the only thing that ever has.
User avatar
pa_friendly_guy
 
Posts: 1502
Joined: Sun Jan 08, 2012 9:24 pm
Location: SW Pa They changed me to zone 6a what ever that is. I still figure zone 5

PreviousNext

Return to Heating and Cooling

Who is online

Users browsing this forum: No registered users and 10 guests

cron